Note
Access to this page requires authorization. You can try signing in or changing directories.
Access to this page requires authorization. You can try changing directories.
Important
- This is a production-ready preview feature.
- Production-ready previews are subject to supplemental terms of use.
Applies to Dynamics 365 Project Operations Integrated with ERP and Dynamics 365 Project Operations for manufacturing
Note
Community interest groups have now moved from Yammer to Microsoft Viva Engage. To join the Expense Management Viva Engage community and take part in the latest discussions, go to the Expense Management (Web, Mobile & Expense Agent) community and select Join.
This document provides an intuitive wizard experience designed to streamline setup. It provides all prerequisites, detailed instructions, and direct links to relevant settings in one centralized location.
Note
To run the agent deployment wizard, go to the Dynamics 365 Agent Deployment tool in Power Platform admin center.
This tool is continuously evolving, with ongoing automation of other steps to reduce manual effort. This document is updated with the latest enhancements, making it your single source for all Expense Agent setup-related guidance.
Administrators can now complete the entire process without navigating between platforms. For efficiency and simplicity, everything you need is consolidated here.
Review the prerequisites before running the wizard. Learn more about the prerequisites in Agent Deployment tool.
Set up Expense Agent
Note
All screens shown are for indicative purposes and might differ from actual screens due to updated features or options.
To set up Expense Agent, follow these steps:
Sign in to Power Platform admin center by using an Admin User (recommended).
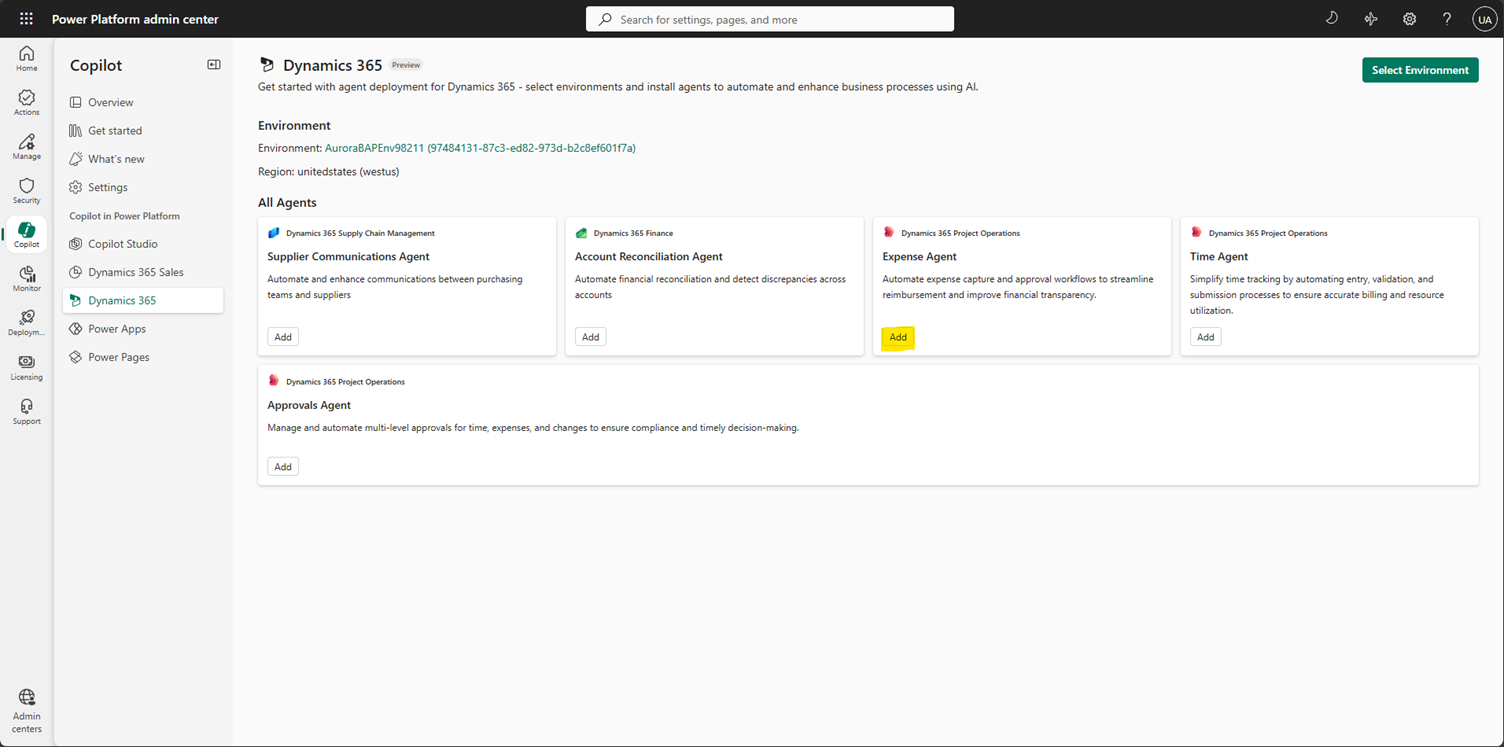
Go to Copilot > Dynamics 365 to see all available agents. Alternatively, go to Agent Deployment Tool.
Select Select Environment and choose the target environment for Expense Agent setup.
Select Add next to Expense Agent to launch the wizard.
On the overview page, review the high-level steps required to set up the Expense Agent (optional but recommended). Then select Next.
Check all prerequisites before proceeding. Ensuring they're met helps you have a smooth setup experience.
- Finance and operations environment: You need at least version 10.0.45 (10.0.2345.170 and later), 10.0.46 (10.0.2428.108 and later) or 10.0.47 (10.0.2527.38 and later) of the finance and operations environment to install the agent.
- Install Copilot for Finance and Operations app and should be 1.0.3231.4 or later. Learn more in Set up the Expense Agent to know more on steps to install the app
- Enable Copilot in Power Platform admin center.
- Enable Copilot Studio message consumption and billing: The link takes you to the Power Platform admin center where you can set consumption and billing.
- Refresh virtual entities (optional but recommended for Expense Agent). Though optional, refreshing virtual entity before the next steps is highly recommended. Expect this step to take around 10 minutes. If you see a "completed with errors" message, retry by selecting Refresh until you get "Refresh completed successfully."
Select Next, and then select the Expense Agent user ID that you already created.
Assign the needed licenses and roles to the Expense Agent and select Next.
Create connections and activate flows: Select the + button beside each connection, select Create, pick the Expense Agent user account, and allow access. Repeat for all connections.
Note
Create connections by using the Expense Agent user only.

When done, select Add connections to the agent.

The next step is to activate flows - select Activate flows. If there are any errors while activating the flows, retry by selecting Activate flows.

Select Next once all flows are activated.
The last step is to update the environment variables.
Enter the folder path from the shared mailbox (enter Inbox if none created).
Enter the shared mailbox email address. Refer to the parameter table for details.

Select Update environment details to save and then Next to complete the setup of the Expense Agent.

Related information
- Expense Agent overview
- Expense Agent Configuration
- Installation and Setup of the Expense Agent
- Expense Agent FAQs